This tasty taco hummus is a party on a plate! It makes a fun party appetizer to share with friends or a great snack for the family to faceplant into after school or work.
Helloooooo hummus!
We’ve been on a bit of a hummus kick lately and I’m crazy excited to share my latest creation with y’all!
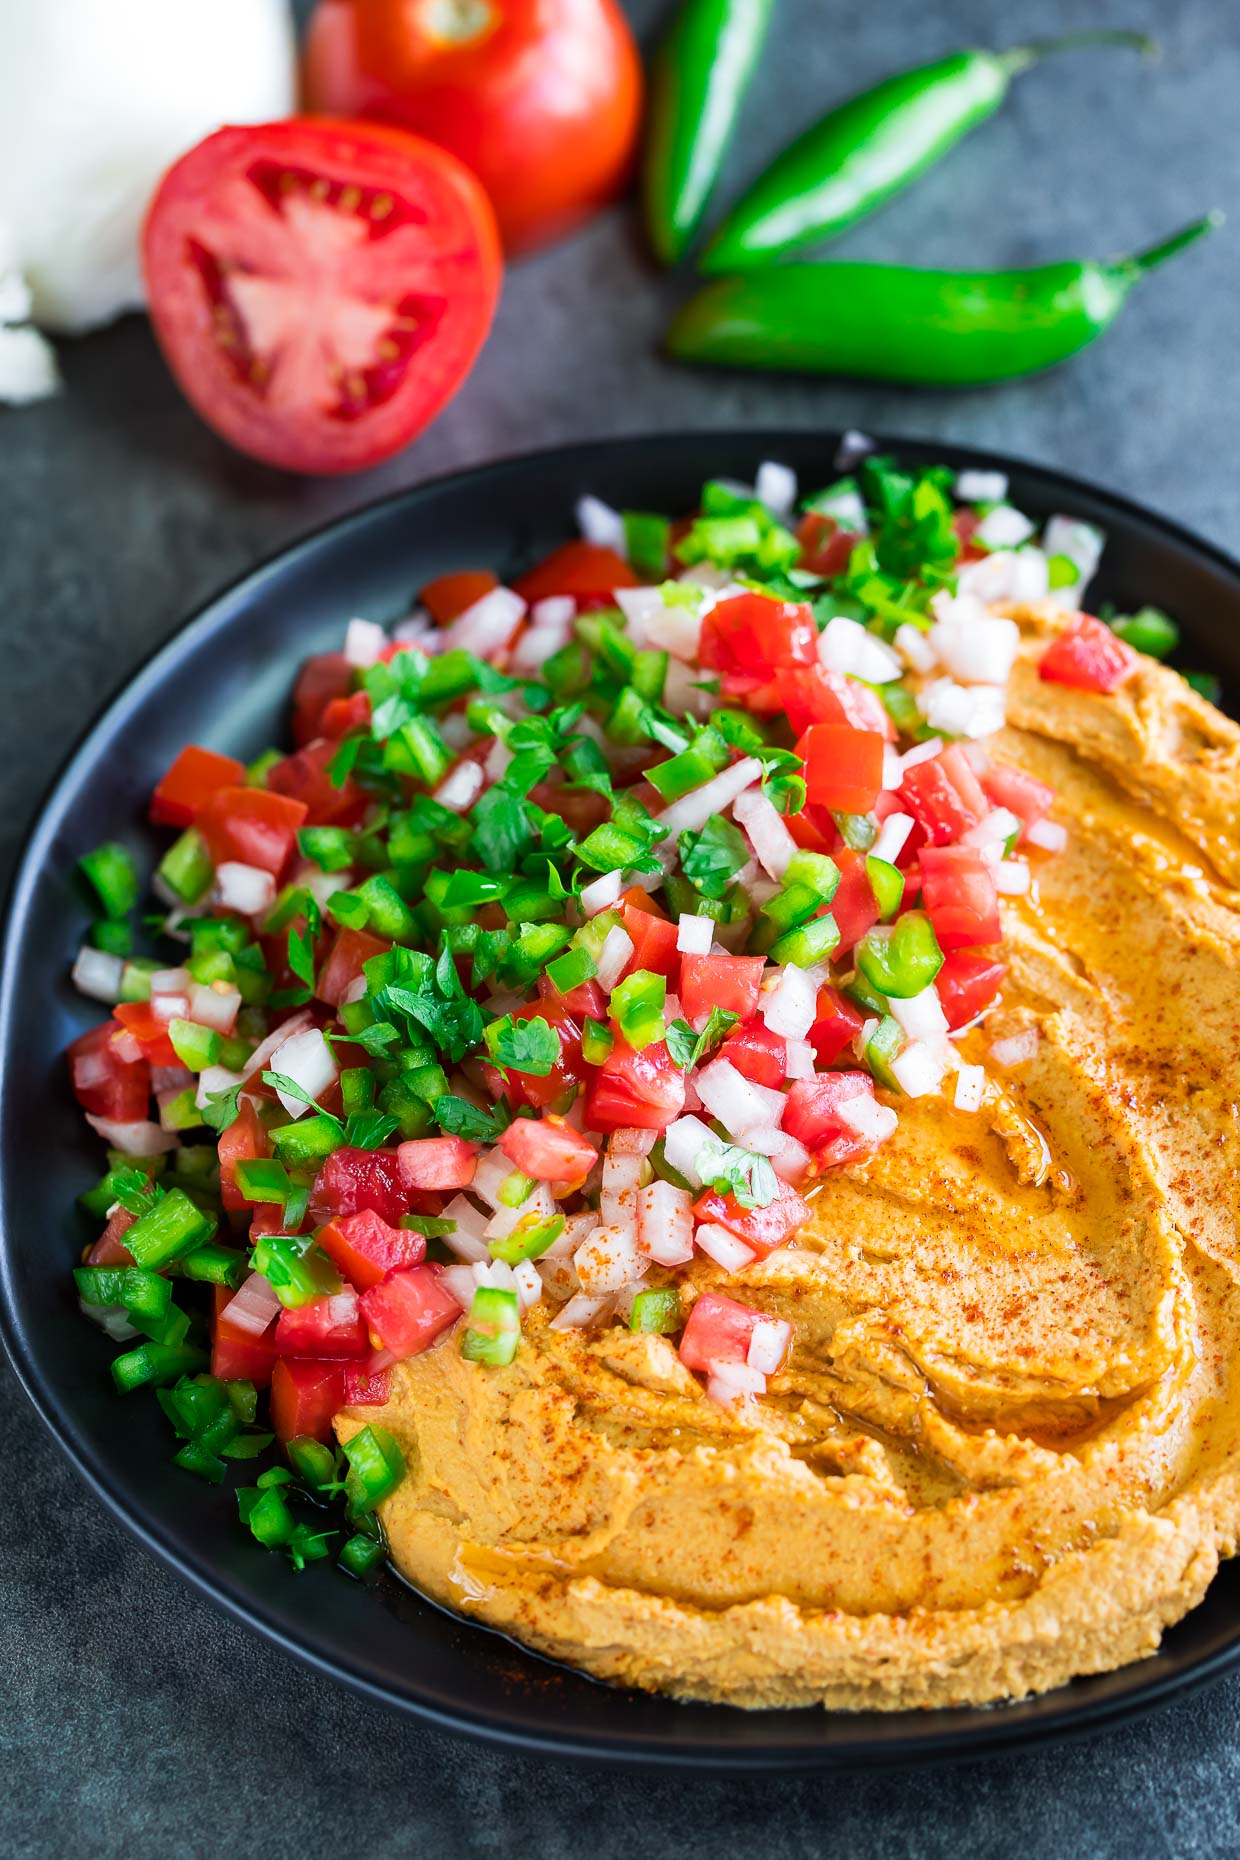
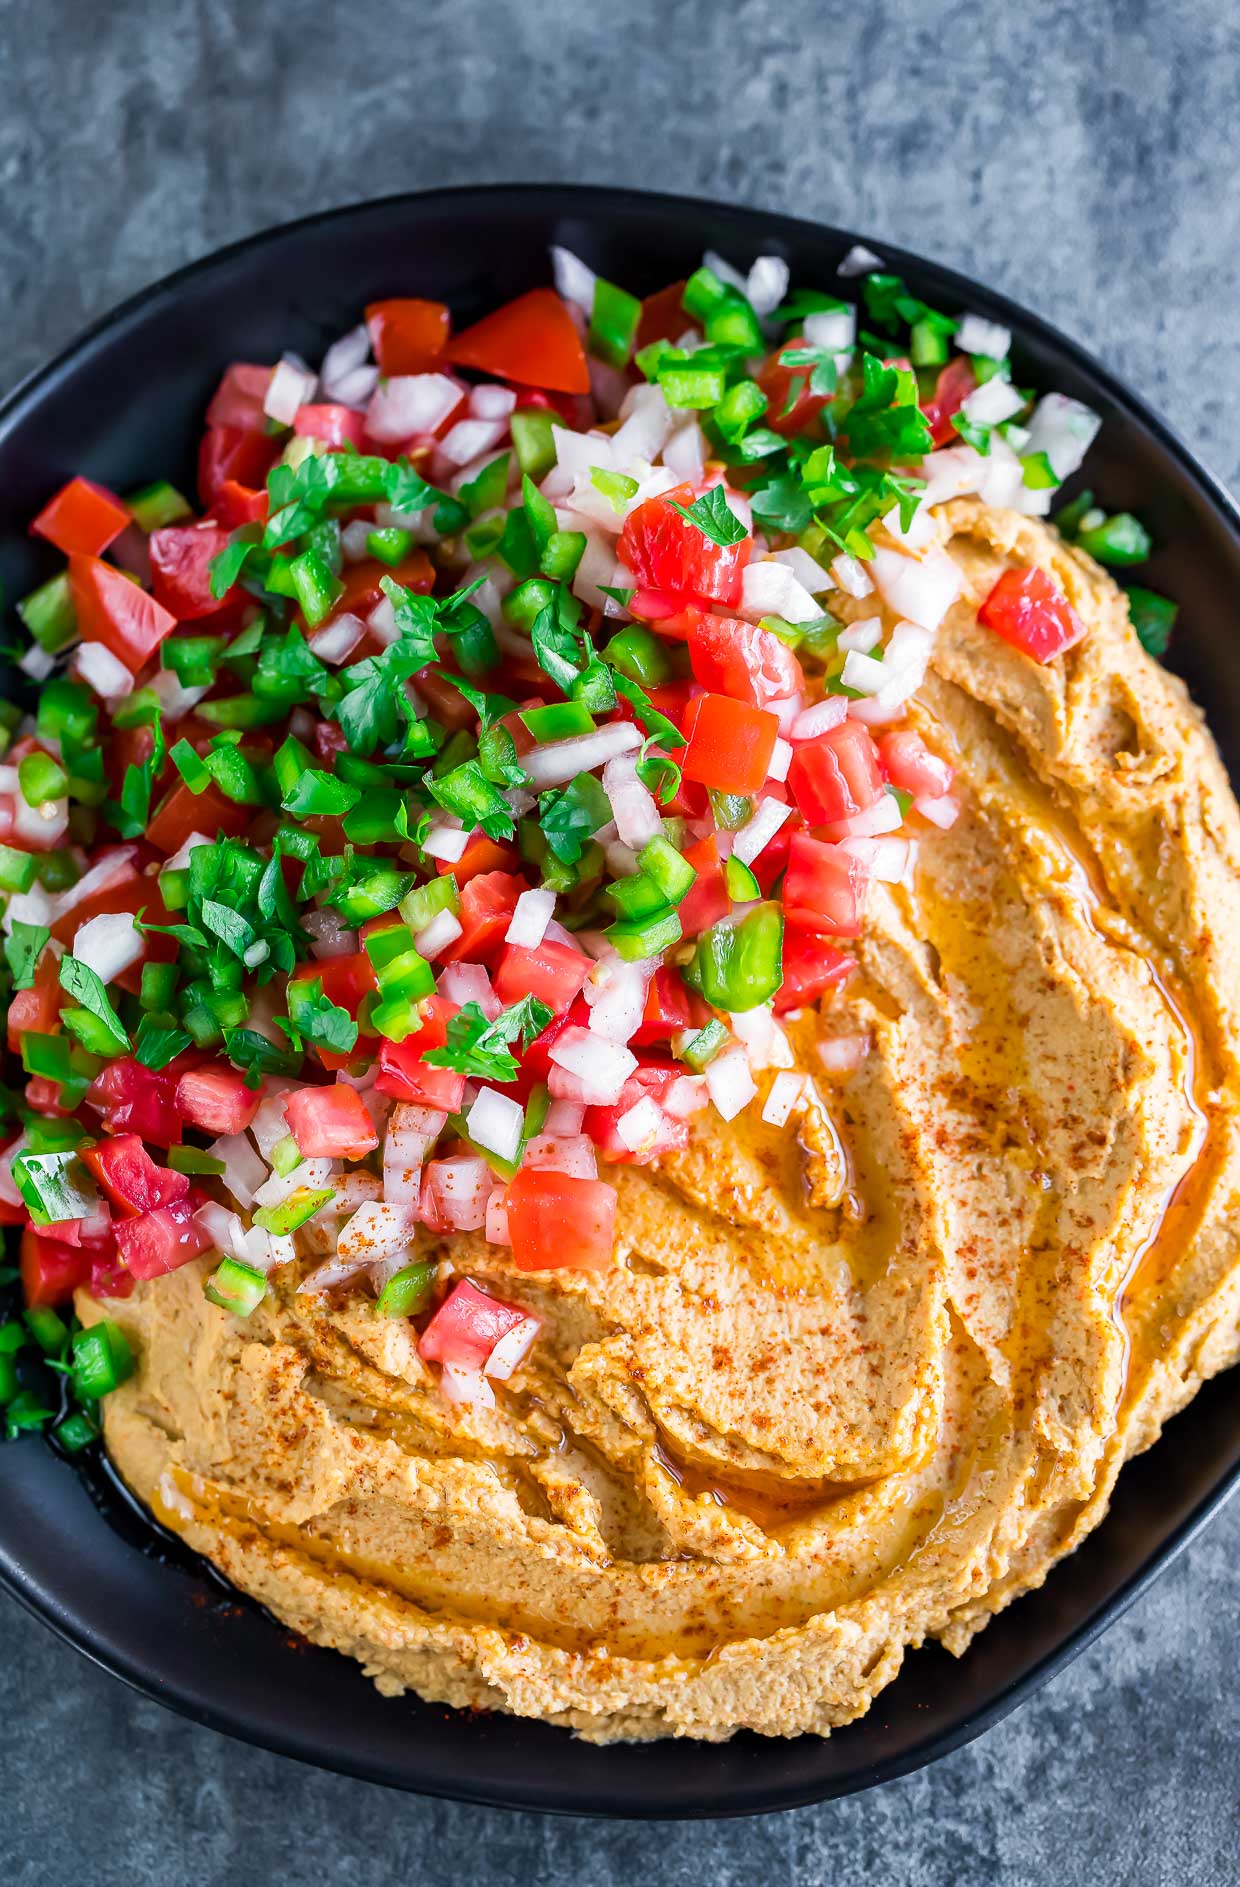
This delish dip has a 7-layer dip vibe to it but with taco spiced hummus in place of the refried beans.
It’s fun, flavorful, and easy to make!
Feel free to add your favorite toppings to the mix (helloooo avocado!) and turn it into a snack plate or party platter with tons of tasty extras.
serving suggestions
Go the traditional route with pita wedges and slice veggies or mix things up by scooping this dip with crunchy tortilla chips!
Looking for veggie inspiration for a taco hummus party platter? Colorful sliced bell pepper, halved sweet mini peppers, baby carrots, celery sticks, cucumber slices, and cauliflower florets are all great options!
special diets and swaps
As written this recipe is deliciously vegan and gluten-free.
Feeling cheesy? Some crumbled feta or cotija cheese would be a delicious addition. You could even drizzle some sour cream on top if you’d like. Have fun with it!
If you don’t have chili powder, cumin, paprika, and cayenne handy you could certainly utilize your go-to taco seasoning blend for this dip. Simply add a Tablespoon to start and then taste as you go, adding extra as needed/desired. If using a pre-made mix with salt in it you’ll also want to hold off on adding the salt until after you’re able to taste test. If anything this is a delicious excuse to turn hummus prep time into snack time. Just dive in with a tortilla chip and adjust to taste.
Taco Hummus
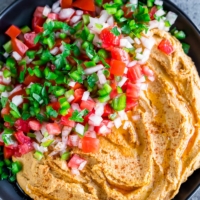
Taco hummus FTW! We love pairing this creamy, flavorful dip with fresh pico de Gallo and crispy tortilla chips.
Taco Hummus
Ingredients
- 15 oz canned chickpeas
- ½ tsp baking soda
- 2-3 cloves garlic
- 3 TBSP lemon or lime juice (freshly squeezed if possible)
- 1.5 tsp ground cumin
- 1.5 tsp chili powder
- 1 tsp paprika plus extra for topping
- ½ tsp sea salt
- ¼ tsp ground cayenne pepper
- 2 TBSP avocado oil or olive oil, plus extra for drizzling
- ¼ cup tahini plus extra, to taste
- 2 TBSP ice water
SPEEDY PICO DE GALLO
- 1 large roma tomato
- 1 jalapeño
- ⅓ cup diced white onion
- ⅛ tsp salt
- fresh cilantro to taste
Instructions
- Drain and rinse your chickpeas, then add to a medium saucepan with 1/2 tsp of baking soda. Pour in water until it's about an inch or two above the chickpeas, then set to boil on high for 20 minutes. Toss your garlic in after 10/15 minutes to soften.
- While the chickpeas boil away, make your pico. Dice the tomato and onion, then minced the jalapeño after removing the seeds and stem. For a spicy topping, add some of the seeds back in! Combine veggies with cilantro and salt, then set aside.
- Pour chickpeas and garlic into a fine mesh strainer and drain. You can pick off any skins that popped off the chickpeas if you'd like but it's totally optional!
- In a trusty food processor or high-powered blender, add chickpeas, lemon/lime juice, cumin, chili powder, cayenne pepper, paprika, salt, and avocado/olive oil. Blend well.
- Scrape down the sides as needed and add tahini and ice water. Continue blending until hummus is delightfully smooth and creamy!
- Feel free to add any extra tahini, oil, or ice water as needed. Next, add any extra seasoning to taste (I always dive in with a tortilla chip or a carrot to taste test) and scrape into a bowl for serving.
- Top hummus with Pico de Gallo, as well as a drizzle of oil and sprinkle of paprika. Dive in with your favorite dippers!
Notes
Nutrition
This healthy hummus was inspired by Sabra’s Taco Inspired Hummus. Love it so!
If you get a chance to try this tasty taco hummus, let me know! You can leave me a comment here (LOVE checking those daily!) or tag @PEASandCRAYONS on Instagram so I can happy dance over your creations. I can’t wait to see what you whip up!
hungry for more hummus?
- Spicy Hummus with Jalapeño Salsa
- Mediterranean Bruschetta Hummus Platter
- Layered Greek Hummus Dip
- Healthy Hummus Stuffed Peppers <– you could totally use this taco hummus in this easy recipe!


Questions & Reviews
Love this hummus! I doubled the chickpeas but left the other ingredient amounts the same. It is still spicy and flavorful enough! Instead of oil and water I used chickpea liquid from the can. Ive never thought of making taco hummus but this is amazing!!!
This was easy and very tasty. I followed the recipe as written but I would recommend doubling the recipe for a crowd. We enjoy “football food” during the fall season and this has been added to the rotation. Fast, easy and delicious.
Would smoked paprika work instead of plain paprika?
Hi LouAnn! The flavor of smoked paprika is pretty strong so I would start with 1/8 tsp and then you can add any extra desired after tasting. Hope you adore the hummus as much as I do!
Are you sure it needs 1/4 cup Tahini??
Hi Kathleen! I always use 1/4 cup when I make this hummus and similar hummus recipes of mine as well. You could try it with a tablespoon less of Tahini and add an extra TBSP cold water or maybe 1 TBSP fresh lemon juice for some zippy flavor?
Absolutely delicious! I’ve made this several times – it’s a no-fail recipe. Everyone has loved it, and it’s great for vegetarian/vegan preferences.
Ahhh yay!! Thank you Jeannie!
I really loved this hummus! I want to make it again but don’t love the taste of tahini. Any suggestions for subs or how I could use less? Thanks!
Hi Sara! So glad you loved the hummus! So for less tahini flavor you can 100% reduce the amount and use ice water to make the hummus creamy. I will try and play around with the ratios next time I make it but let me know if you get a chance to experiment first! xoxo
So, to clarify, if I’m using canned garbanzo beans, I should still cook with the baking soda to soften them, correct??
Hi LouAnn! Correct – this is what I do to help remove the skins for a smoother hummus.
Can this be made ahead of time? How long would this last in the refrigerator if I wanted to take it to work for lunch?
Yes absolutely Sharon! My tip would be to keep the topping and hummus separate until serving so the pico doesn’t let off too much liquid and make the hummus soggy. Just combine before serving and dig in! I like it room temp best (or slightly warm after just making it) but if you like chilled hummus totally go for it! Both the pico and the hummus will keep the same as normal leftovers, approx 4 days in the fridge in an airtight container. xoxo
This hummus is delicious! I did skip the boiling the chickpeas step and I left out the tahini because I’m not a fan of it but the rest of the recipe I followed and YUM!
what is the purpose of the baking soda?
Hi Kiki! Fun science trick: the baking soda makes the water more alkaline, which softens the chickpeas and helps them cook more quickly! This little trick with boiling and baking soda-ing the chickpeas has been a favorite of mine for a while when making super creamy hummus. Also blending a bit longer than usual helps make the hummus even more creamy. xoxo
Could this be canned?
Hi Jill! I’ve never canned hummus before so I can’t speak from experience.
Really Really love these Recipes.
Tacos + hummus = a match made in heaven! This looks great!
Thanks Carla!
I love hummus! And this flavor is perfect. Making it for the next game day!
Hope you adore it, Tayler! We’re totally bonkers for this stuff!