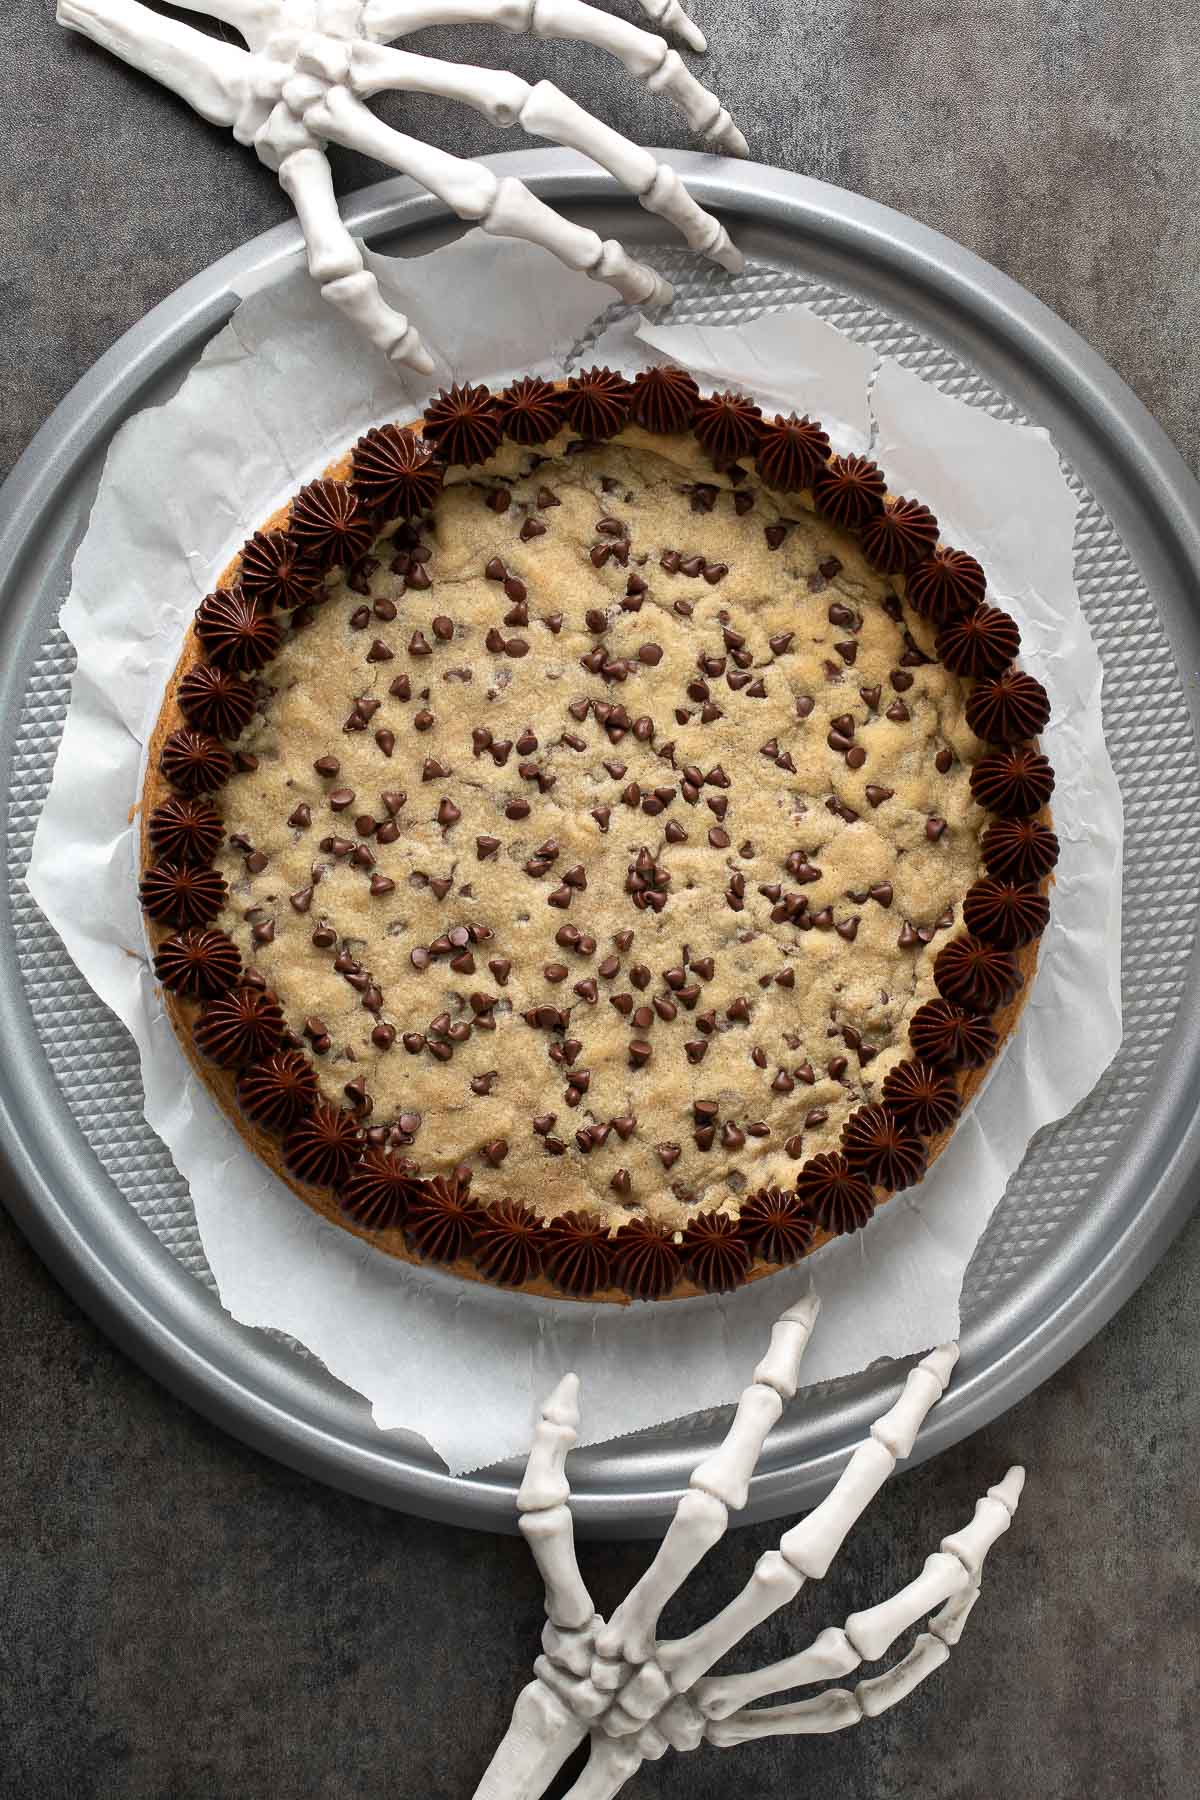
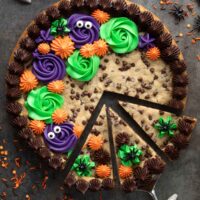
This delightfully spooky Halloween Cookie Cake is loaded with mini chocolate chips and festively frosted with a colorful buttercream icing, candy eyeballs, and scary spiders!

Because we all know I love a good cookie cake, this spooky sensation is joining my holiday cookie cake lineup along with my heart-shaped Valentine Cookie Cake, flag-themed Fourth of July Cookie Cake, and holiday wreath Christmas Cookie Cake. Pretty sure I have a few others up my sleeve so stay tuned for the cookie cake craziness if you’re a chocolate chip enthusiast like moi.
It’s late September while I’m writing this and you bet your bottom my house is fully decorated for Halloween at this point.
It’s my favorite holiday and while I could wax poetic on my love of all things ghostie and skeleton for hours, I’m simply going to insist you join me in the kitchen to make this fun and frightful treat!

Halloween Cookie Cake Ingredients and Extras
One of my favorite things about homemade cookie cakes, is that the ingredients are easy to always have on hand. Butter, a large egg, and various pantry staples are all you’ll need!
- 170 grams unsalted butter
- 150 grams light brown sugar
- 50 grams granulated sugar
- 1 large egg
- 2 tsp vanilla extract
- 240 grams all-purpose flour
- 2 tsp cornstarch
- 1 tsp baking soda
- 1/2 tsp salt
- 1 cup mini chocolate chips
- candy eyeballs
- plastic spiders (or icing spiders) for decor
NOTE: Be sure to use real butter for this recipe, as “buttery spreads” and margarine will not work.
The cornstarch in this recipe helps give the cookie cake a more tender, chewy texture just like the mall cookie cakes so I always keep a small jar on hand.

Vanilla Buttercream Icing
- ½ cup unsalted butter (1 stick)
- 1 ½ cups powdered sugar (180 grams)
- 1-2 TBSP heavy cream or heavy whipping cream
- ½ tsp vanilla extract
- ⅛ tsp salt
- gel food coloring in purple, green, and orange
Homemade buttercream icing and/or frosting can be frozen in an airtight container or freezer bag for up to 1-3 months and in the fridge for 1 week. This comes in handy for advance dessert prep and also if you ever end up with any leftover frosting after decorating the cake.
Chocolate Fudge Frosting
- 3 oz bittersweet or semisweet chocolate bar (quality chocolate chips will work too) 85 grams
- 5 TBSP unsalted butter (71 grams)
- 1-2 tsp unsweetened cocoa powder
- 1 tsp pure vanilla extract
- 2-3 TBSP heavy cream as needed
- 1.5 cups powdered sugar (170 grams)
- ⅛ tsp fine sea salt
Easy 3-Ingredient Chocolate Ganache
Prefer a less sweet icing for your cookie cake? Pipe the edges with a luxe chocolate ganache! I love the ganache recipe from Erren’s Kitchen and it’s so easy to make! Note that if making a ganache (I used this for the photo shoot cookie cake) you’ll want to set aside 2 hours of resting time to allow it to thicken/set for piping.
Q: CAN I USE STORE-BOUGHT FROSTING?
You absolutely can! Feel free to pick up a tub of vanilla and/or chocolate frosting from the grocery store.

Icing Piping Tips
Using an assortment of star tips gives the cookie cake it’s fun pattern of rosettes and starbursts. If you need a few stainless steel piping tips to get started, this cupcake decorating set is an amazing deal!
I used Wilton open star tips 6B and 4B for the little starburst accents and to pipe the circumference of the cake. To make the icing roses I used Wilton drop flower tip 2D. You could also use a 1M open star tip to create flowers.
I’m not the most tech savvy when it comes to creating videos (any local DFW peeps want to come help me? lol) but there are some awesome youtube tutorials out there if you’re brand spanking new to piping frosting.
For the starbursts I give the piping bag a light squeeze then press down and pull up in a quick motion. To make roses I start in the middle and draw a little counter-clockwise spiral while gently squeezing the piping bag. It’s super easy and you can even practice on parchment paper first.
If you have any more questions shoot me a comment below and I’ll walk ya through it to help you make the cookie cake of your dreams a reality! Let’s get our cookie on!
Halloween Cookie Cake
Need a larger cake to serve a crowd? Use my giant cookie cake recipe and you’re good to go!
If you get a chance to try this Halloween Cookie Cake, let me know! You can leave me a comment here (LOVE checking those daily!) or tag @PEASandCRAYONS on Instagram so I can happy dance over your creations. I can’t wait to see how you decorate your cookie!
Halloween Cookie Cake
Equipment
- 11-inch springform pan (see notes for different sizes)
Ingredients
- ¾ cup unsalted butter (1 + 1/2 sticks) aka 12 TBSP
- ¾ cup light brown sugar (150 grams)
- ¼ cup granulated sugar (50 grams)
- 1 large egg
- 2 tsp pure vanilla extract
- 2 cups unbleached all-purpose flour (240 grams)
- 2 tsp cornstarch
- 1 tsp baking soda
- ½ tsp fine sea salt
- 1 cup mini semi-sweet chocolate chips plus extra for topping
- optional sprinkles, spiders, and candy eyeballs for decorating
VANILLA BUTTERCREAM FROSTING
- ½ cup unsalted butter (1 stick) softened to room temp.
- 1 ½ cups powdered sugar (180 grams)
- 1-2 TBSP heavy cream or heavy whipping cream
- ½ tsp vanilla extract
- ⅛ tsp fine sea salt
CHOCOLATE FUDGE FROSTING
- 3 oz bittersweet or semi sweet chocolate bar or chocolate chips (85 grams)
- 5 TBSP unsalted butter (71 grams)
- 1-2 tsp unsweetened cocoa powder
- 1 tsp pure vanilla extract
- 2-3 TBSP heavy cream as needed
- 1.5 cups powdered sugar (170 grams)
- ⅛ tsp fine sea salt
Instructions
- Before we begin, I’m begging you to take the optional advance prep or refrigerating the dough for 24 hours. It takes the flavor and texture over the top! You can chill your dough 1-3 days in advance. When ready to bake set the chilled dough out on the counter for an hour or so until soft enough to tear off chunks to press into an even layer the springform pan.
- Let’s make a cookie cake! First bring butter and eggs to room temp. To soften faster, unwrap the butter, slice into 8-10 pieces, then allow to soften. The butter is ready when a light imprint can be left in the stick of butter with your thumb.
- Measure flour by weight (best results) or using the fluff-spoon-level technique. In a medium bowl, whisk together flour, cornstarch, baking soda, and salt. Set aside.
- Cream together softened butter and both sugars in a stand mixer with the paddle attachment. Start at the lowest speed and increase as needed for approx. 2 minutes. Scrape down sides if needed.
- Add the egg and vanilla and mix into the dough on medium speed, approx. 30-45 seconds.
- Add flour mixture to the larger bowl slowly while mixing on low speed.
- Once the flour is almost incorporated add chocolate chips and beat on low until the flour is fully incorporated. (take care not to over-mix at this point)
- Place dough on a large sheet of plastic wrap or parchment paper and wrap securely. Refrigerate overnight or 1-3 days for advance prep.
READY TO BAKE?
- Remove dough from the fridge and allow to soften on the counter for approx. one hour.
- Preheat oven to 350°F and line bottom of the springform pan with parchment paper.
- Break off small chunks of dough and arrange in the pan. Press together to create an even layer of cookie dough along the bottom of the springform. Gently press some extra chocolate chips on top for a picture-perfect cookie cake.
- Bake in the pan on the center rack of the oven at 350°F for 15-17 minutes until the dough has fluffed up and is just slightly starting to darken in color.
- Remove from oven and place on a wire cooling rack to fully cool. Remove the springform ring to help it cool faster. It should be fully set and cool enough to handle after one hour. While it cools, make your frosting and plan for the fun part – the decorating!
VANILLA FROSTING
- In the bowl of a stand mixer fitted with the paddle attachment or in a large mixing bowl using a handheld mixer, beat the butter until smooth and creamy, stopping to scrape down sides as needed. (approx. 1-2 minutes)
- Add the powdered sugar and mix on low speed at first to incorporate then increase to medium speed and continue mixing for 1-2 minutes or until fully combined. Add the heavy cream, vanilla extract, and salt and continue mixing on medium speed until everything is well-combined, smooth, and easy to pipe.
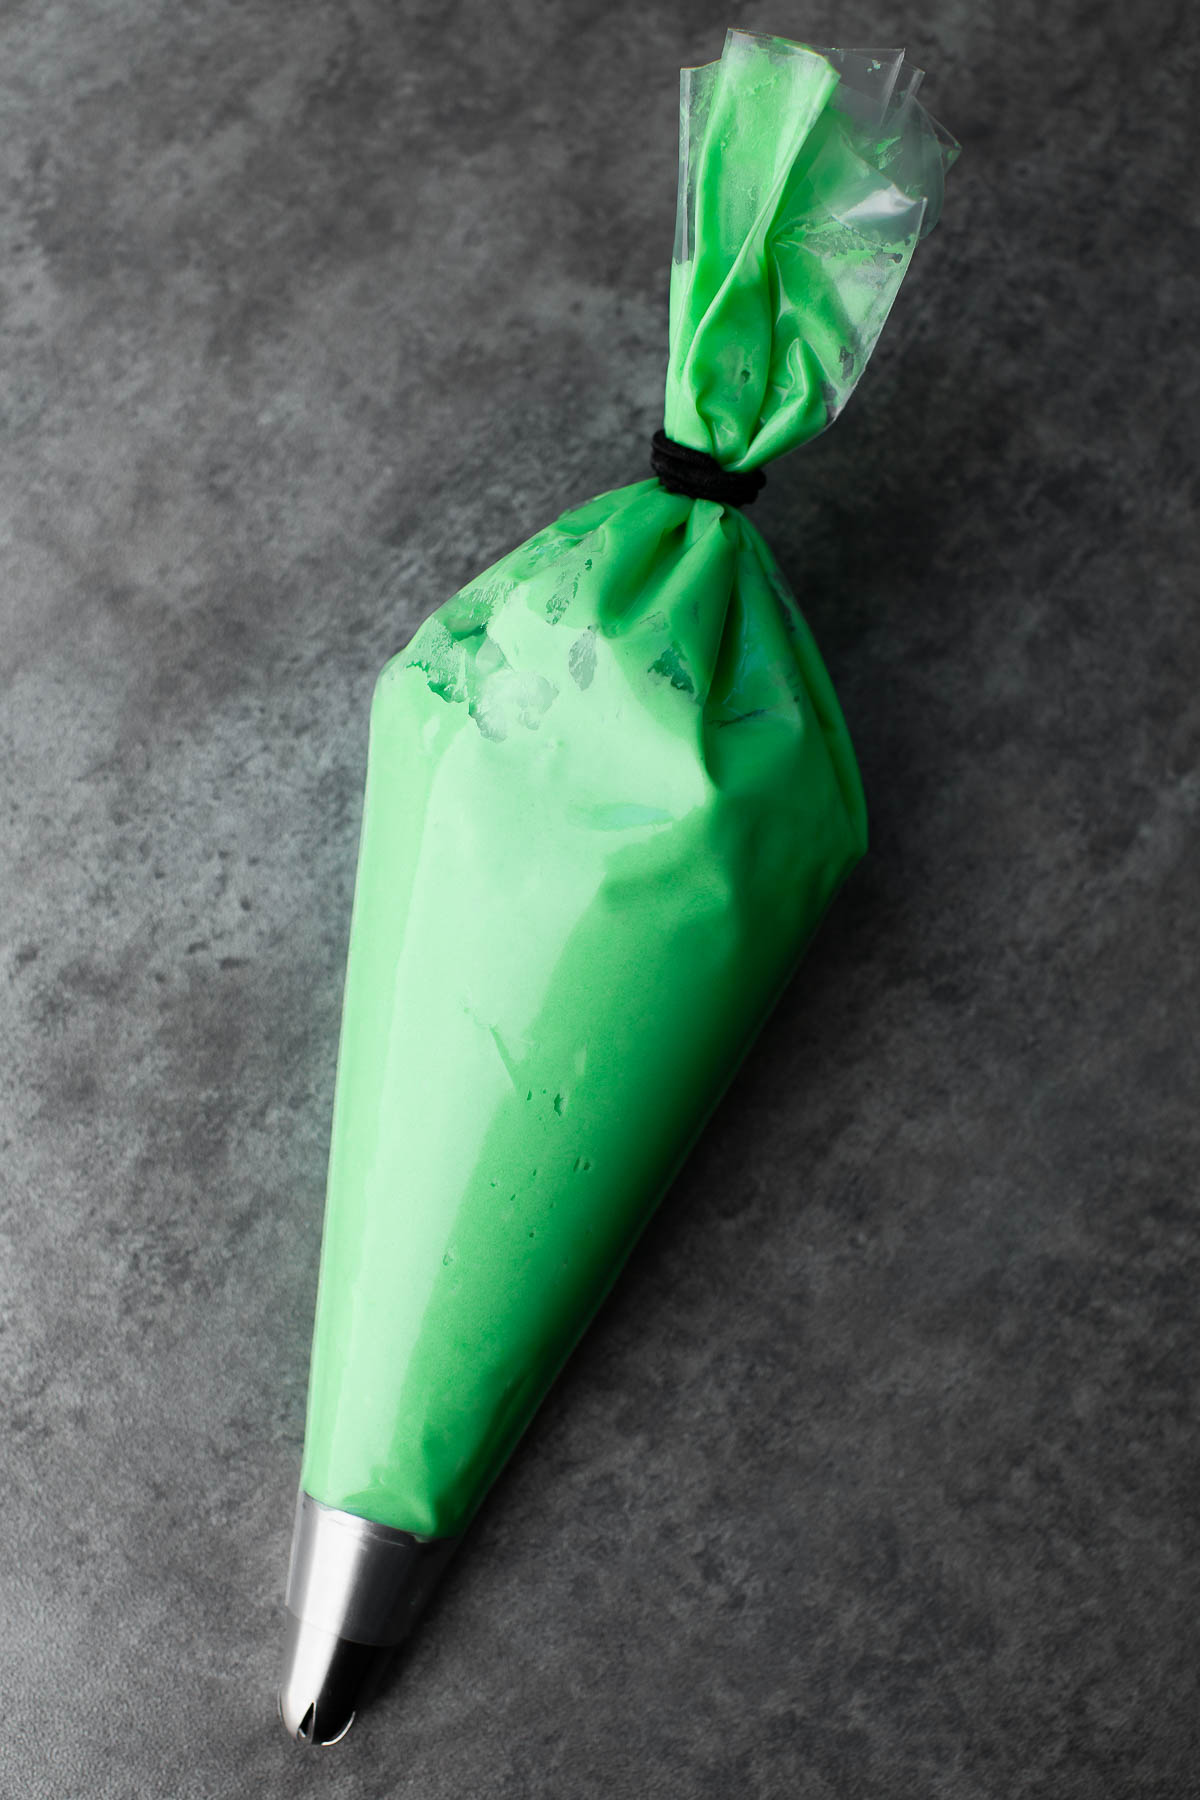
- For colorful frosting, simply divide frosting into portions and add a few drops of gel food coloring to each. Start with less as you can easily add more if desired. Mix with an electric hand mixer or by hand with a large spoon.
CHOCOLATE FUDGE FROSTING
- In a glass mixing bowl, melt the chocolate and the butter in the microwave for 60 seconds (this can be done on the stove as well). Mix and melt an additional 10-20 seconds as needed. Mix well to fully combine. Allow it to cool for 15 minutes.
- Next in a large bowl with an electric hand mixer, whip together chocolate/butter mixture with vanilla extract and salt to enhance the chocolate flavor. Sprinkle in powdered sugar slowly in 2 batches while mixing on low until fluffy and fully incorporated. Add cream as needed and mix to desired consistency.
DECORATING TIPS + TRICKS
- Transfer to piping bags fitted with assorted piping tips to create cute starburst and rose designs. For the starbursts I give the piping bag a light squeeze then press down and pull up in a quick motion. To make roses I start in the middle and draw a little counter-clockwise spiral while gently squeezing the piping bag. It's super easy and you can even practice on parchment paper first.
- Top off your designs with little candy eyeballs and some plastic (or icing) spiders and any extras your spooky heart desires. Soft sprinkles can be added too – have fun with it!
Notes
Nutrition
Basic Equipment Needed
The easiest way to make this cookie cake is with a stand mixer.
This cookie cake can be made in an 11-inch springform pan or an 11-inch pizza pan.
If using a 9-inch or 10-inch springform pan, adjust bake time from 16 minutes to 18-20 minutes. (check at 18 min then add additional time as needed.) Once the top has fluffed up and appears to darken just slightly in color it will be ready to remove.
I also use parchment paper to prevent sticking and help with easy removal and transfer of the cookie cake plus piping bags and assorted piping tips to make the frosting designs.
COOKIE CAKE BAKING TIPS AND TRICKS
My first tip is to use a small, inexpensive digital kitchen scale to measure flour and sugar. If you’ve had repeated issues with cookies and cakes not turning out – the scale will be a lifesaver and revolutionize your baking game!
If you don’t have a scale for accuracy, use the second most accurate method of measuring flour: the spoon and level technique. First fluff the flour with a spoon then gently spoon it into a dry measuring cup. Use a butter knife or bowl scraper to scrape the excess so its level with the top edge of the measuring cup. Packing the four into the cup or using the measuring cup to scoop itself full of flour will make the cake dry/crumbly instead of tender and chewy.


Questions & Reviews
Cookie cake is delicious and I love the easy decorating. Thank you for providing such details for piping. I made this for neighbors children…they loved it. Can you share the brand of gel food coloring used in your photo? My orange and green turned out fine but the purple was not as vibrant as yours.
So glad you enjoyed the cookie cake, Jennie! Thank you! I used Wilton’s violet gel food coloring for my purple. I prepped in advance for this cake and find that making the frosting a day or two before I need it for a cake/party will help the colors intensify and deepen. Sometimes I’ll add a little bit of rose and/or blue to alter the hue of the purple too. There’s also a speedier microwave trick where you add a little bit of the purple frosting to the microwave for a few seconds to help emulsify the dye with the butter and the whip it into the remainder of purple and it helps deepen the color. I’m still experimenting with that one so it has been an adventure of trial and error, lol!
Recipe is delicious! Amazing flavor.
So stoked you enjoyed it, Lizette! Thanks for being my taste tester!!